Student Information
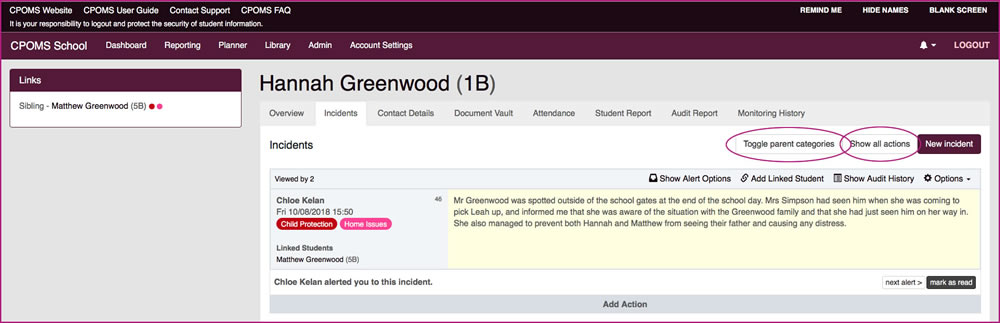
Once you have submitted an incident, you will be taken back to the students whole incident log, and the incident which you have just added will be highlighted in yellow.
This page is the student’s entire incident log, and if you have access to all of the categories you will be able to see every record held in CPOMS for that particular student.
The incidents will be listed chronologically from the oldest at the bottom to the newest. You can select to open all actions associated with each incident at once by clicking ‘Show all actions’ at the top of this page, or alternatively select to open the actions associated with each individual incident.
By selecting the ‘Toggle parent categories’ it will show you both the parent and sub-category selected. The system will default to show you just the sub-category.
At the top of the page you will see several different tabs. These all hold different information about the student.
Student Overview
If you click on the Overview tab, you will see all of the basic information about that child such as their D.O.B, Gender, SEN status, Medical Conditions etc.
All of this information is imported from your MIS system, and as such any new information which is added or updated within your MIS will be imported into CPOMS by the following day.
The combined body map will show you all of the body map markers from all incidents added for this student, on one image. Any related incidents will be listed to the right hand side, and when hovered over, will highlight the related markers on the body map for that particular incident.
There is also an ‘Incidents by category’ pie chart which shows a break down of all incidents logged, by category for that pupil. As well as a timeline diagram which shows you the incidents logged over a period of time, handy for noticing any patterns that are forming, or an improvement once an intervention has been put into place.
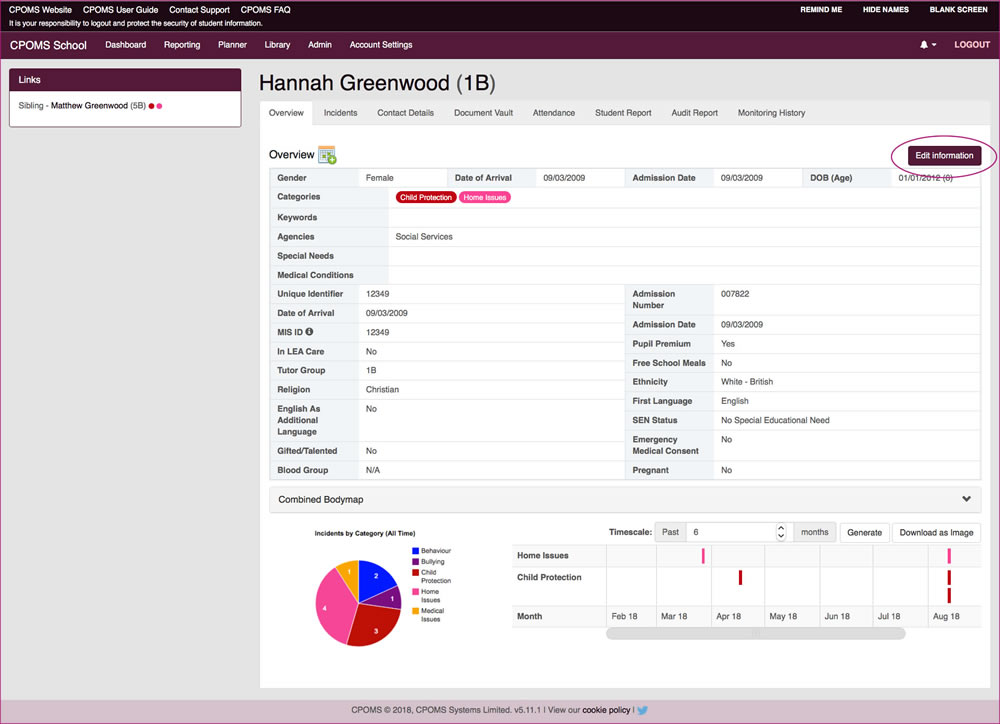
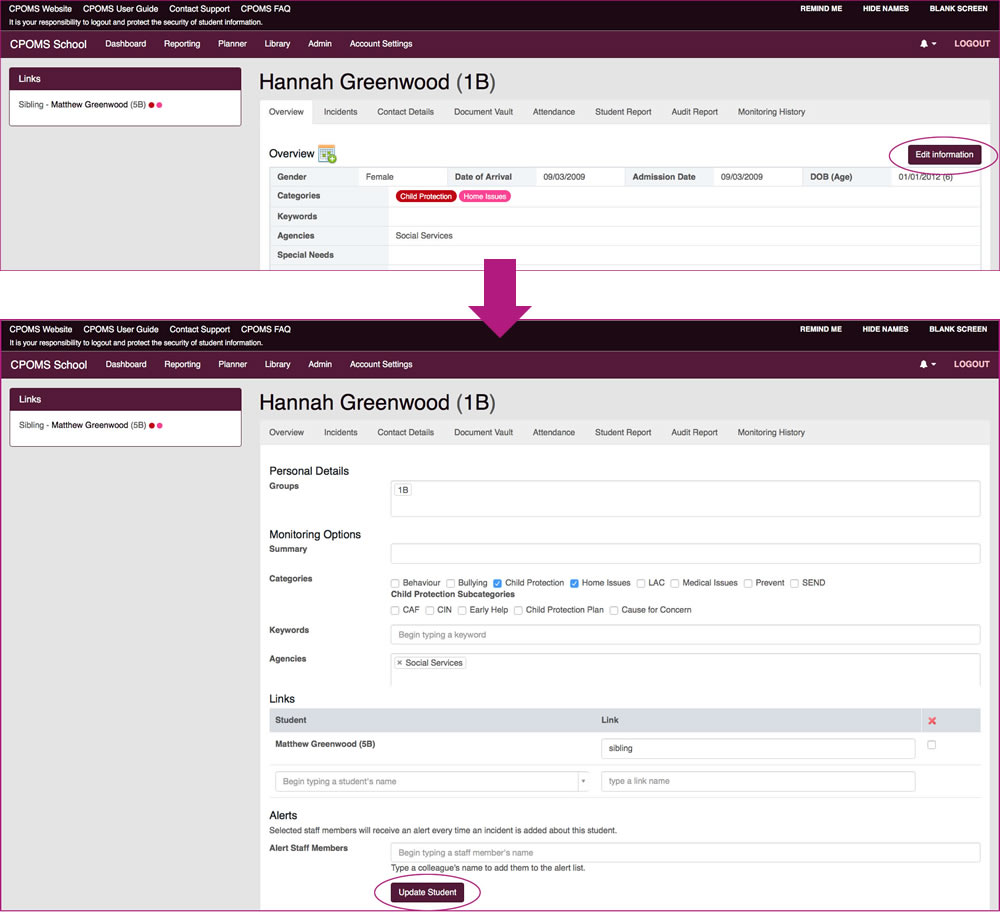
By clicking ‘Edit information’ to the right of this tab you can also do the following:-
- Summary – allows you to add a summary line which will appear at the top of the students overview on save. This could be a Social Workers details, or a note regarding the student.
- Categories – here you can manually monitor a student for a certain category by ticking the category name, or likewise un-monitor a student for a certain category if it is no longer required by un-ticking the category name.
- Key words – add key words for this student i.e. allergy, wears glasses which you can then search by later.
- Agencies – here you can manually flag up agency involvement by clicking on the field and selecting from the drop-down list, or likewise remove their involvement if it is no longer required by clicking the ‘x’.
- Links – under links you can add in any manual links for this student, i.e. a cousin or neighbour which is not picked up automatically by your MIS.
- Alerts – here you can set up automatic alerts for this particular student by typing in the relevant staff members name(s) to ensure that any time an incident or action is logged against that student the member of staff is automatically alerted.
Once you have made any changes here, please click ‘Update Student’ to save.
Incidents
The second tab is the Incidents tab which we have already seen in detail, this is where you will find the students full chronology, and the ‘New incident’ button.
Contact Details
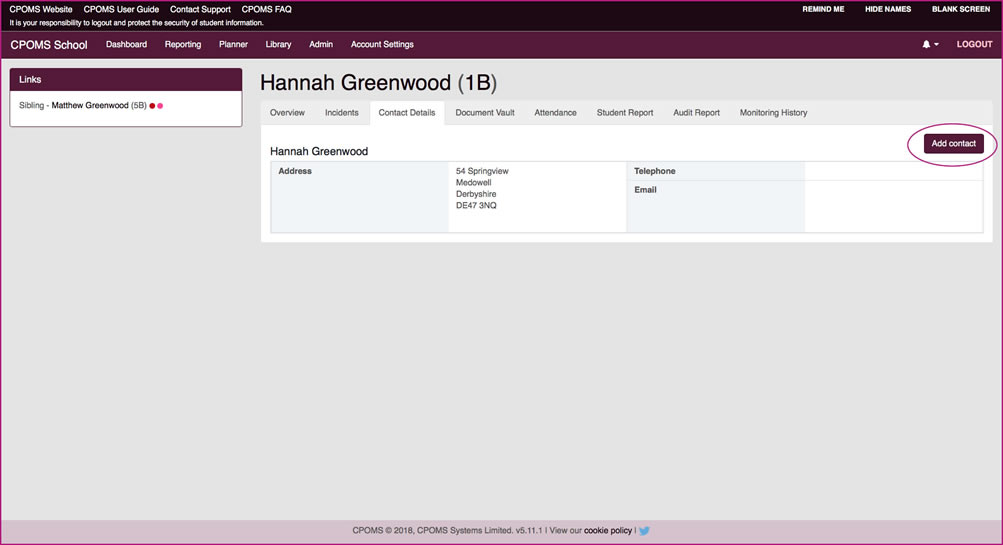
This holds the main contact details for each pupil.
You may also add any additional contacts directly to CPOMS, i.e. the students assigned Social Worker, using the ‘Add contact’ button in the top right-hand corner.
Document Vault
The Document Vault is the fourth tab along and can hold any type of document which you may wish to upload to CPOMS. Once a document is uploaded to CPOMS it is encrypted so it is highly secure.
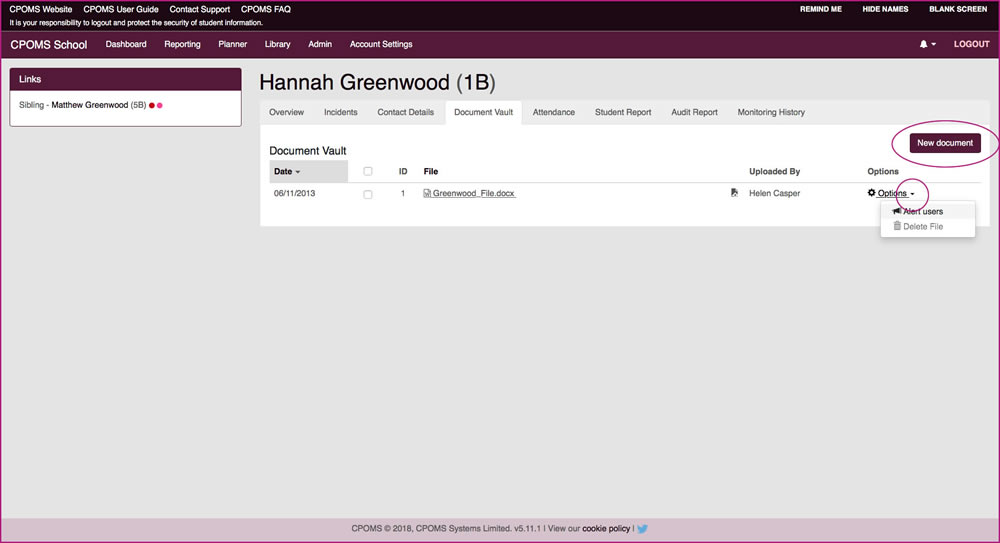
Documents which are added from within an incident/ action will also be listed here (if you have access to the category that they were added to) with a link to view the original incident/ action.
If you add a document directly to this area you can also choose to alert staff to the fact that it has been added.
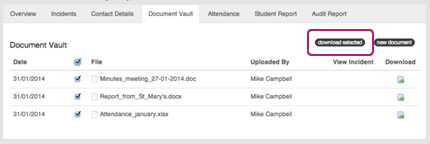
You can also choose to download all documents associated with a student into a zip file together, as below.
N.B Please note that any document added directly to the vault can be viewed by all key holders. If you wish to restrict access for certain documents please make sure that they are uploaded within a category restricted incident or action. This way only key holders with access to this category will ever have access to the file.
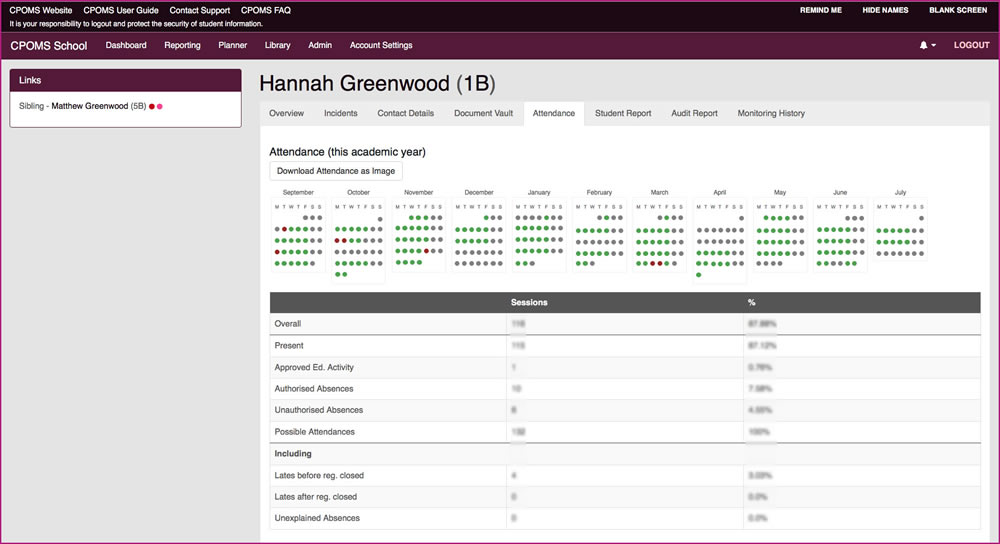
Attendance
The fifth tab is Attendance. This holds the basic attendance data for the student and will be up-to-date as of the previous day.
It will also show present and absent marks over time in a calendar format, handy for spotting any patterns that are forming.
Student Report
Tab six is the Student Report tab which allows you to report on all of the information held within the system for this particular student. The report will include the student’s basic data at the top (which you can filter out if required, using the ‘include in report’ tick boxes).
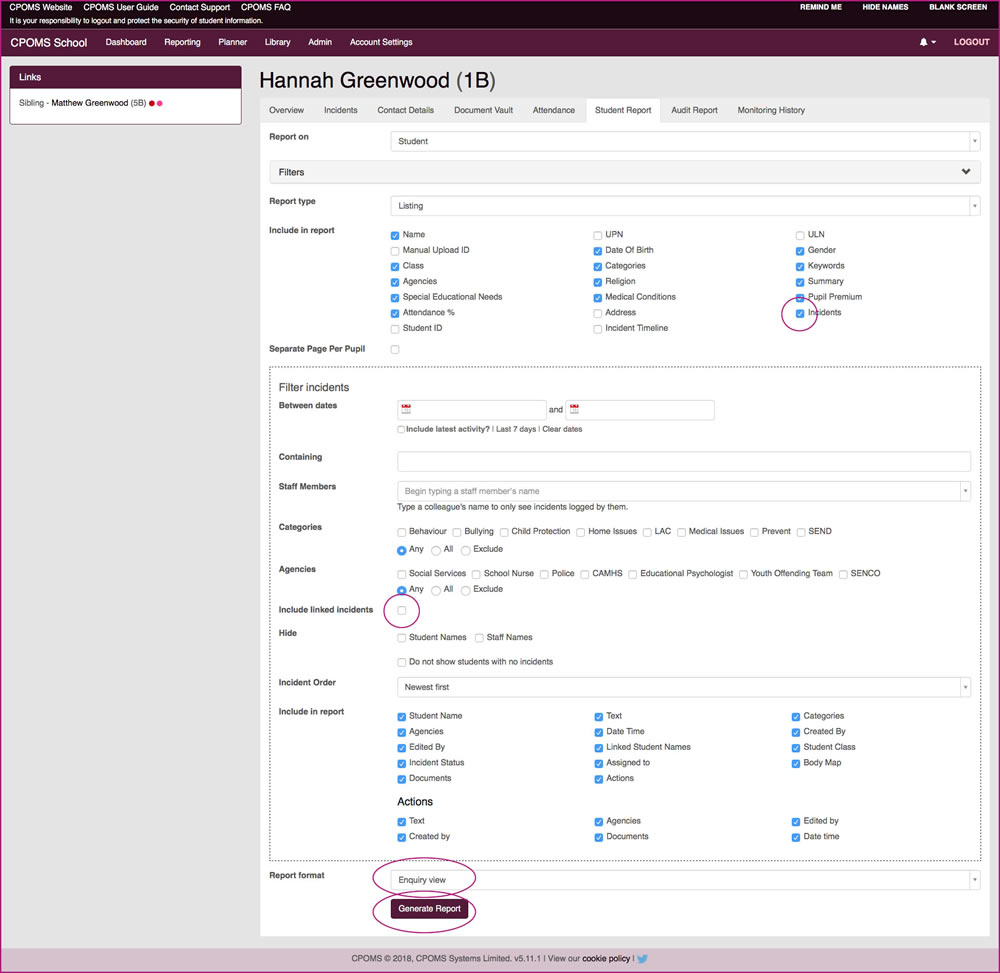
Q: How do I run a full student report/ chronology?
- To run a full student report, access the child’s profile via their class list, or using the ‘quick student search’ and click into their name.
- Select the ‘Student Report’ tab and tick the ‘Incidents’ check box to ‘Include in report’.
- In the additional filter options that appear, you may wish to also tick ‘Include Linked Incidents’ to ensure that you receive anything the student has been linked in to.
- To print all records please ignore the further additional filter options, or you may apply specific dates or select certain categories here.
- Scroll down to the ‘Report Format’ and amend this to ‘Print View (PDF)’ and finally ‘Generate Report’. This will then generate a PDF copy of the child’s incidents which you can then print or save electronically.
You can run all reports within CPOMS in ‘Enquiry View’ to view the report on screen or ‘PDF (Print View)’ to create a printable PDF copy.
To print off a singular incident you can click ‘![]() Print View’ under ‘Options’ in the top right-hand corner of each individual incident. This will generate a PDF document of that incident only with any associated actions which you can then choose to print, or save electronically. You can access a students incidents via their profile and selecting the ‘Incidents’ tab.
Print View’ under ‘Options’ in the top right-hand corner of each individual incident. This will generate a PDF document of that incident only with any associated actions which you can then choose to print, or save electronically. You can access a students incidents via their profile and selecting the ‘Incidents’ tab.
Hiding Names in a Student Report:
When you are running the report, after clicking the filters you will see the option to either hide student or staff names (or both).
As per the guidance for logging incidents, using the hide names feature in a report will only be able to hide certain names within the text of the incident. The only names that will be hidden are where the full first name or surname or both, of the pupil for whom the report is written will be removed, as well as any part of the full name of any of the linked students. If you mention any names of children in the text of the incident who have not been linked please note these will not be hidden. If you also spell the names differently to how it is registered in your MIS or use shortened version of the name these will also not be hidden.
We would always suggest that before you print out a report that you first run it in enquiry view to check that all the required names are removed from the text, and once you’re happy you can then run it as a pdf. If you then find a name that you need to alter you can either link in the required pupils or edit the text of the Incident to use initials for any names that cannot be linked prior to creating the pdf version.
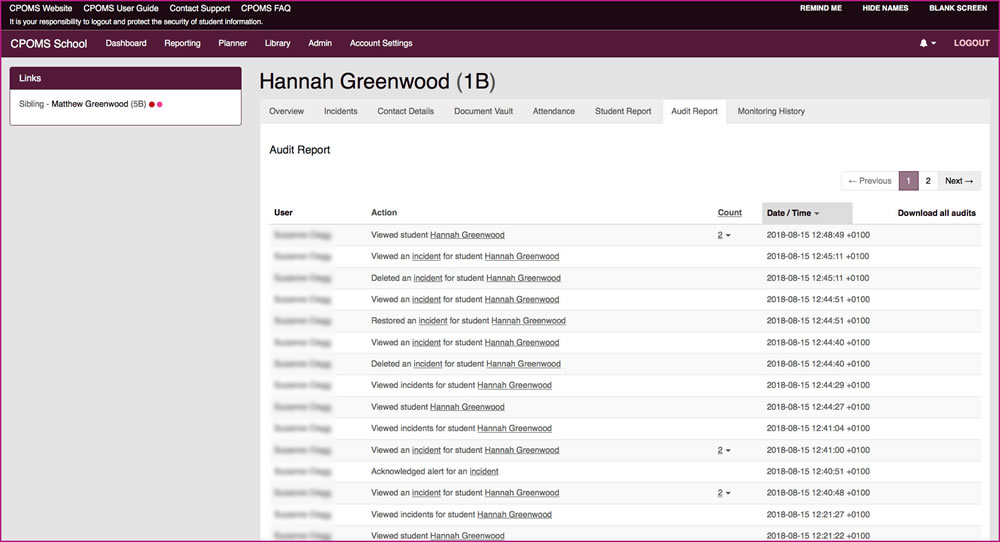
Audit Report
The Audit Report tab details all activity on the system for that particular student to refer to if needed.
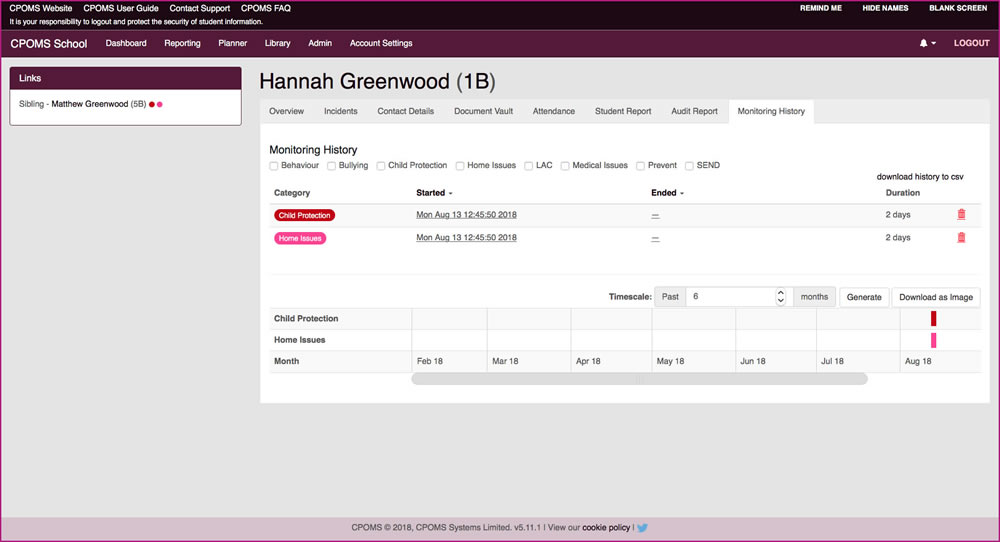
Monitoring History
The final Monitoring History tab provides the date and time stamp of when the student became monitored, and un-monitored for the relevant categories.
This is also available in a timeline view where you can look back at the students monitoring history throughout their school life. This area is handy for noticing any patterns i.e. if perhaps the student has been on and off a certain category.
A student will automatically become monitored as new incidents are added by staff, you can also choose to monitor a student manually within their ‘Overview’ tab, by selecting the ‘Edit Information’ button (to the right-hand corner). From here you can simply tick the relevant category name(s) and scroll down to ‘Update Student’ to save.
Q: How do I un-monitor a student?
To un-monitor a student, click on their ‘Overview’ page and select the ‘Edit information’ button in the top right-hand corner. From here you can simply un-tick the relevant category name and scroll down to ‘Update Student’ to save.
This is important to ensure your monitored student figures are accurate and up to date.