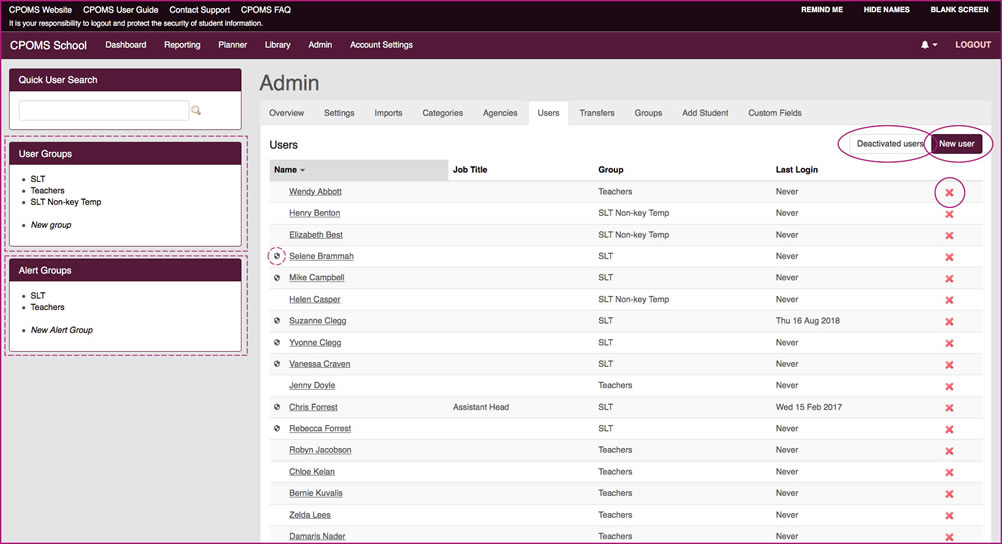
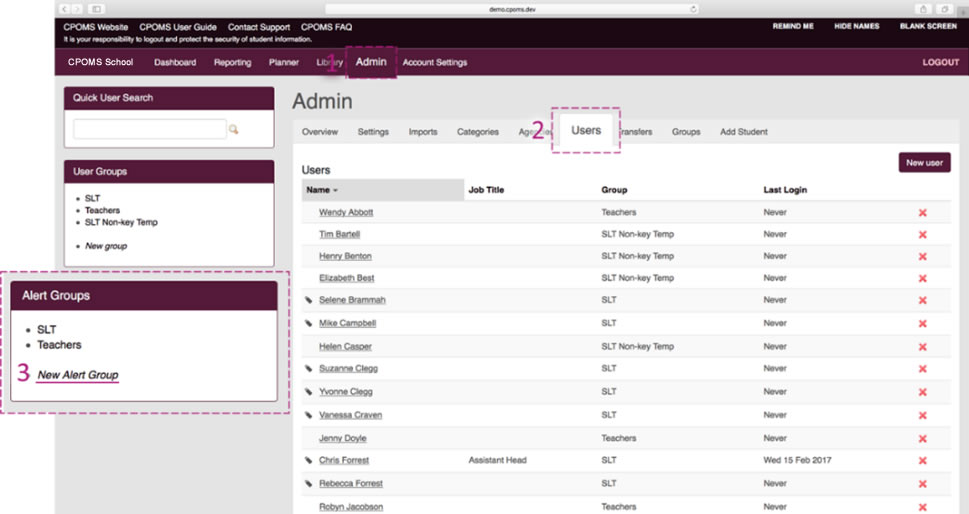
Under ‘Admin’ > ‘Users’ you can add, edit and disable any existing users, and if required re-activate a previous CPOMS user account.
The Users section is all set up in the implementation stages and therefore you should not have much requirement to access it in the first instance.
There is a small shield icon  to the left of each users name who has a key setup currently.
Q: How do I add a new user?
New CPOMS users can be added by an Admin key holder in school.
- Step 1: Navigate to the ‘Admin’ area > ‘Users’ tab and click on the ‘New user’ button (in the right-hand corner).
- Step 2: Select the member of staffs name that you would like to add from the drop-down list provided
- The drop-down list is prefilled from your MIS. To appear here the member of staff must have been added to your MIS, with a current start date and in full time employment. Your import must also be up and running successfully, not ‘failing’ for the list to be up-to-date.
- N.B If you would like to add a member of staff who is not in your MIS system for any reason, we can add them manually for you. Please request this via the ‘Contact Support’ option and include the new users:- full name, email address and user group, stating that the user will not be in your MIS.
- Step 3: Complete the New User form by inputting the users email address and selecting the relevant user group. There is also an option to ‘Send password reset email’ check box if the user will be starting to use CPOMS that day, otherwise they can select the ‘Forgotten your password, or using CPOMS for the first time’ at your login page when ready to get started.
- Step 4: Click save.
Q: How do I deactivate a user?
An Admin key holder in school can deactivate a CPOMS users account.
- Step 1: Navigate to the ‘Admin’ area > ‘Users’ tab.
- Step 2: Locate the user in user list and click on the red ‘x’ icon at the end of their row to deactivate.
Q: How do I reactivate a user?
An Admin key holder in school can reactivate a CPOMS users account.
- Step 1: Navigate to the ‘Admin’ area > ‘Users’ tab
- Step 2: Click on the ‘Deactivated Users’ button to the right-hand side of the screen (next to ‘New User’)
- Step 3: Click the green ‘Reactivate’ button at the end of the relevant users row
- Step 4: Enter the users email address and select the relevant user group when prompted, and click ‘Confirm’.
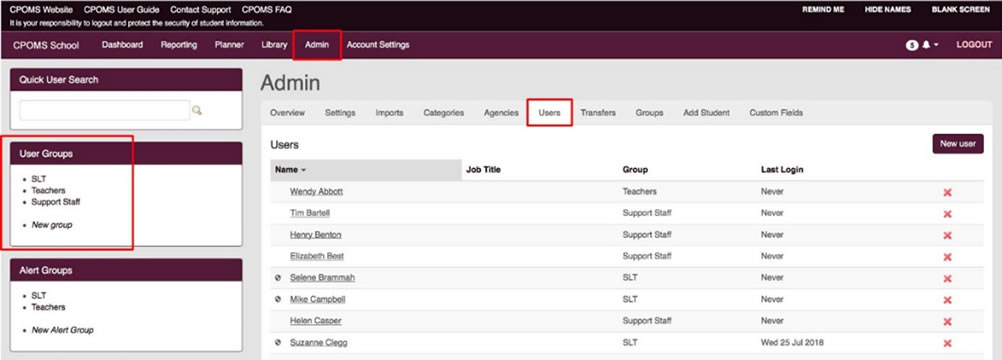
User Groups
The permissions for each user are defined by the User Group they are placed in.
You can check and amend your User Groups within the ‘Admin’ area > ‘Users’ tab by clicking into an existing User Group name, or choose ‘New Group’ to create a brand new one.
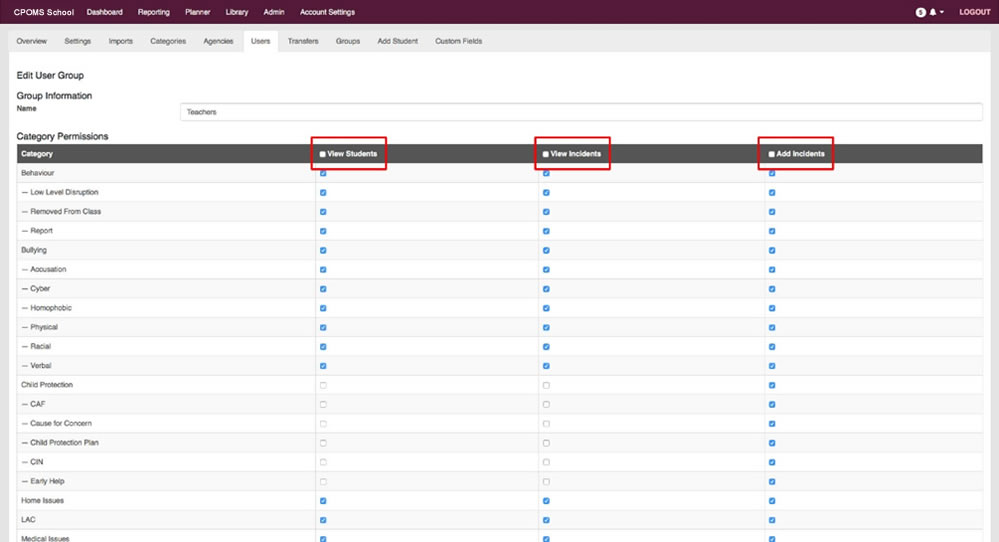
Once you have clicked into the User Group name, you will see a list of your categories, and tick boxes for the following Category Permissions:-
- View Students – would you like the users in this group to be able to view students monitored for this category
- View Incidents – would you like the users in this group to be able to view the incident details for this category
- Add Incidents – would you like the users in this group to be able to add new incidents to this category
Further down the page you will see further tick boxes for ‘System Permissions’, these are:-
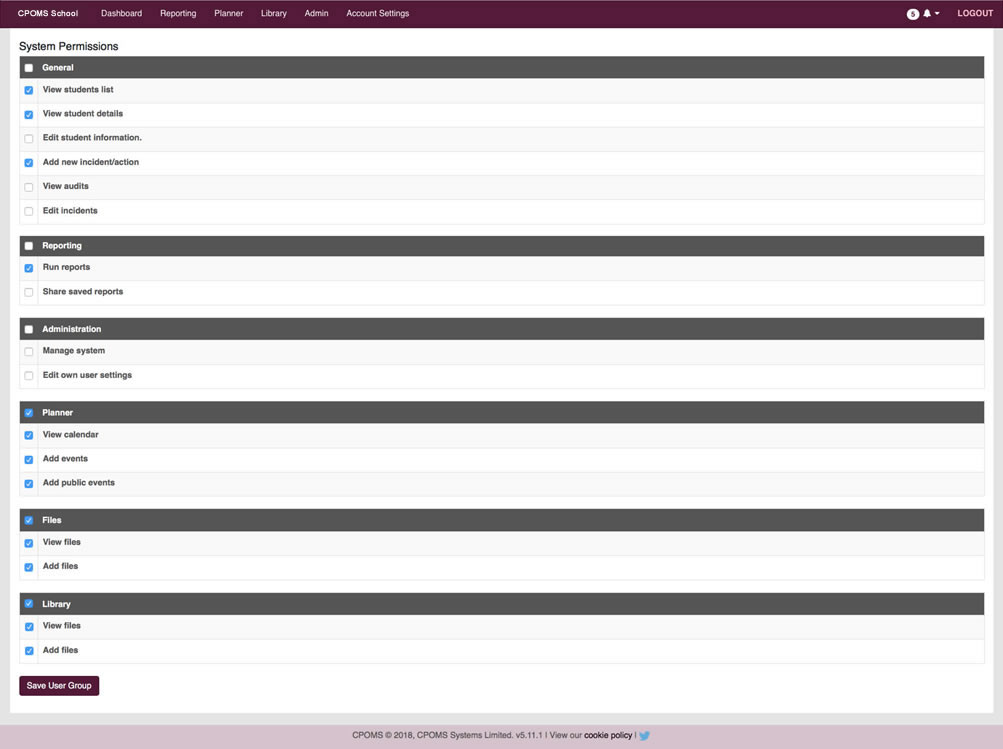
If the user group will be for Non-Key Holders please tick ‘Add new incident/action’ under general only and save ‘User Group’.
If the user group will be for Key Holders you may wish to tick the further options, as follows:-
Under General:-
- View Student List – To allow the user to click into the class structure from the main dashboard
- View Student Details – To allow the user to access a students profile
- Add new Incident/ Action – To allow the user to add incidents and actions to your CPOMS system
Other permissions you may wish to allow for the user group are:-
- Reporting > Run Reports
- Planner
- Files
- And Library
Administration privileges should only ever be given to senior members of staff.
If you make any changes please click ‘Save User Group’.
Q: How do I change an existing users User Group?
Under ‘Admin’ > ‘Users’ you can sort your user list by ‘User Group’ to quickly see who is in which group by clicking on the title ‘Group’ and scrolling through your list.
If you need to adjust a users user group, please click on their name (into their profile), and to the left ‘Permissions’. You can then select the relevant User Group from the drop-down list, and ‘Save’.
Alert Groups
Alert Groups can be created within CPOMS so that when any member of staff creates an incident they can select to alert groups of staff rather than having to alert each person in turn. For example, were a school to have 3 Designated Safeguarding Leads, all 3 of them can be alerted to an incident at the same time with the click of a button.
Alert Groups need to be configured by the school from within your own version of CPOMS.
You can create an Alert Group within your system by accessing the ‘Admin’ area, ‘Users’ tab, and within ‘Alert Groups’ select ‘New Alert Group’.
Firstly enter your new Alert Group Name i.e. SLT, DSL’s.
Next, use the arrow(s) to move across the members of staff that you require to be in the Alert Group to the box on the right. You can also type the names of User Groups within the search bar, e.g. Teachers, to move multiple members of staff at once using the double arrow.
Click ‘Save Alert Group’.
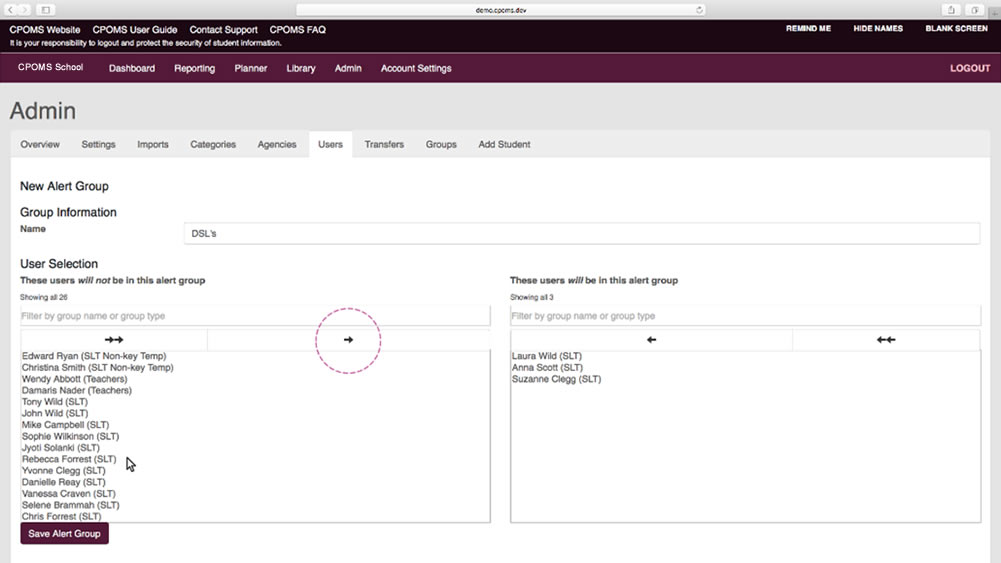
When a member of staff adds an incident to CPOMS, they will now be able to select an Alert Group as per the screen below.

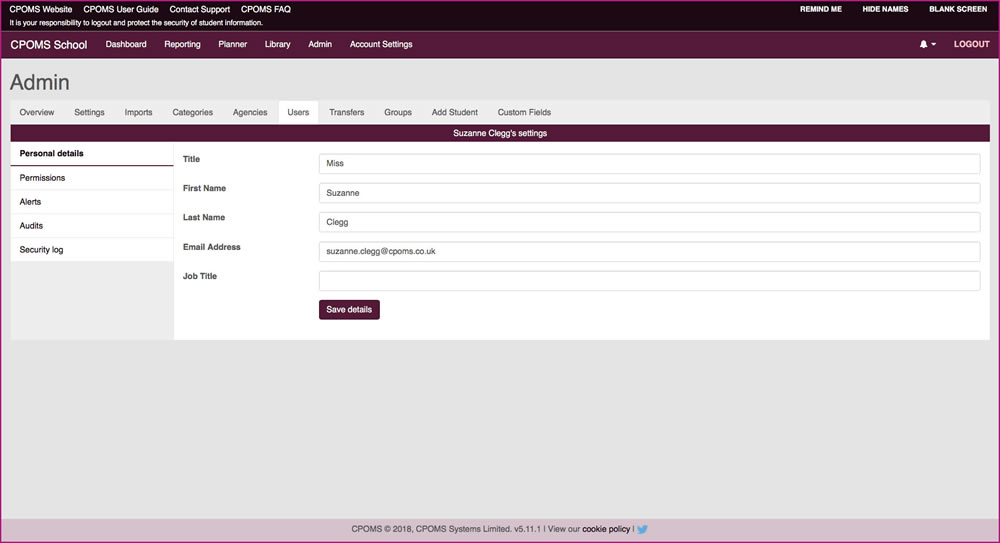
Users Profile
Under Users, you can access and amend each users profile by clicking on their name from your list of users. Here you can choose to amend the users email address (under ‘Personal Details’), or User Group (within ‘Permissions’ to the left).
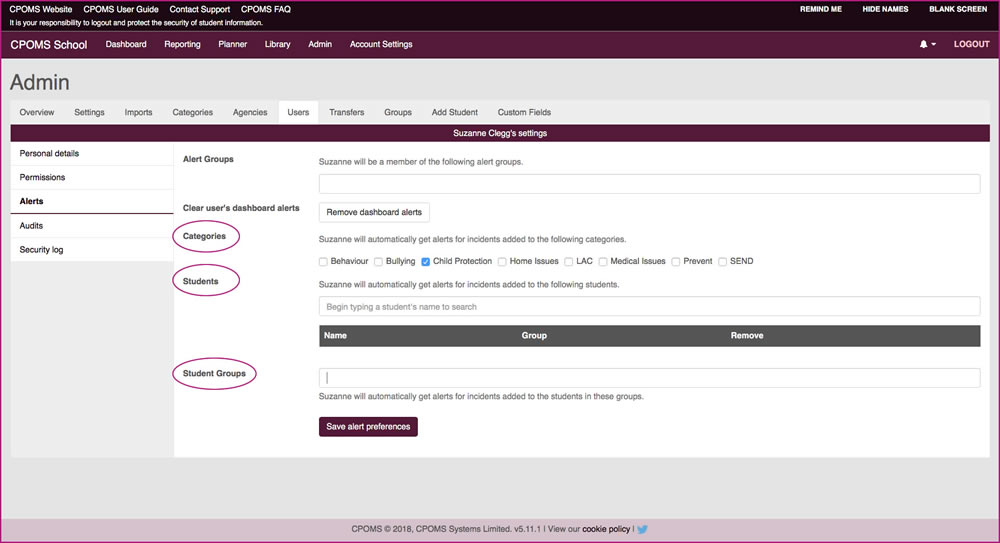
Within each individuals profile, under ‘Alerts’ you can also assign user specific alerts (automatic alerts) by:- Category, Student, or Student Group.
For example, if you want to make sure that every time a ‘Child Protection’ incident is added to the system you are alerted automatically – this can be done here by ticking the relevant category and save.
You can also choose to clear a users dashboard of alerts in full here by selecting the ‘Remove dashboard alerts’ option.
Under Audits you can check out every click of a button for the user in question.
Lastly in Security log you can see the number of times the user has logged in using two factor authentication and the IP location.