Custom Fields can now be added by an Admin Key Holder to your Add Incident and Add Action forms, as well as the Student Overview.
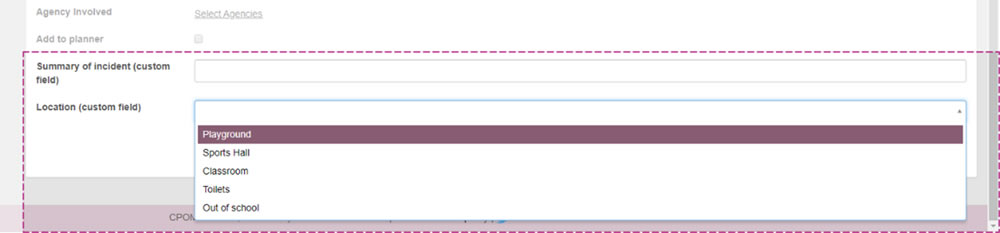
This may be an additional drop down list for the ‘Location’ of an incident i.e. Playground, Class Room, Out of School.
Or a free text box to add a ‘Summary’ of an incident or action taken.
How to add a custom field
Step 1: To create a Custom Field please navigate to the ‘Admin’ area > ‘Custom Fields’ tab and click on the ‘New Custom Field’ button (to the right-hand side of the screen).

Step 2: Complete the ‘New Custom Field’ form.
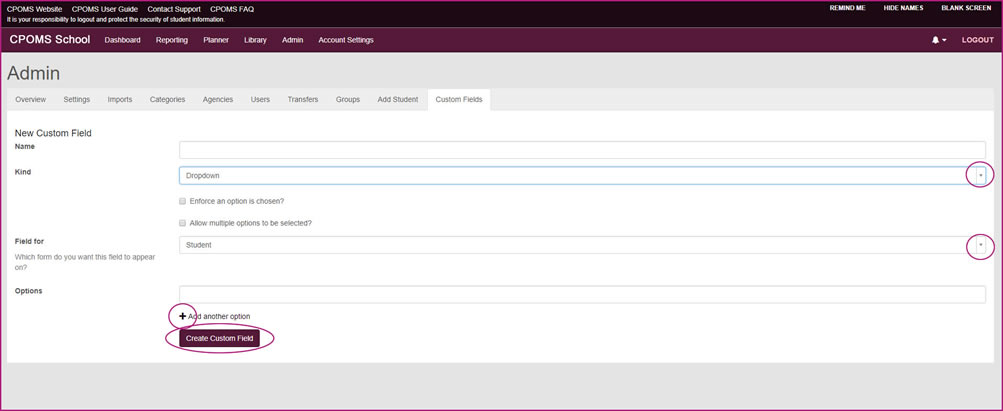
- Firstly enter the ‘Name’ of your new custom field
- Next choose the ‘Kind’ of custom field from our options, which are:-
- Dropdown – to create a dropdown list of pre-set options to choose from
- Example, dropdown list of Location of an incident/ action
- Text – to add an additional line for free text
- Example, to enter a Social Worker name on a student’s overview
- Multiline text – to add an additional text box for more free text
- Example, free text box for a shorter summary of incident/ action
- If you choose Dropdown you will have additional check boxes to:-
- Enforce an option is chosen?
- Allow multiple options to be selected?
- Under ‘Field for’ choose where you would like the new custom field to appear:-
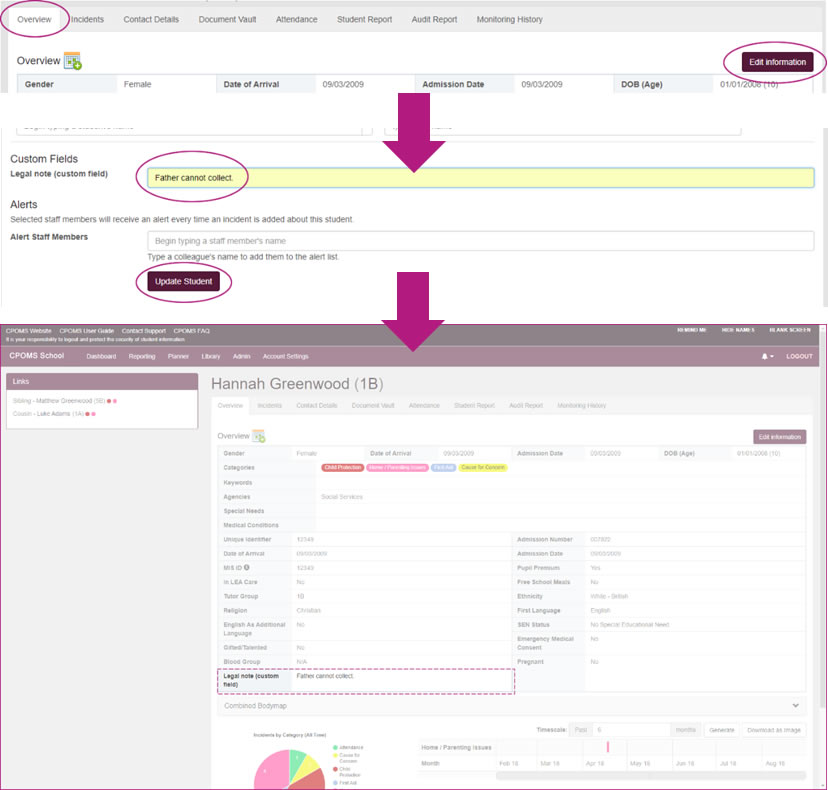
- Student – this will appear within the Students Overview tab
- Incident – this will add the field to your Add Incident form
- Action – this will add the field to your Add Action form
- For Dropdown only enter your ‘Options’ next – these will be the items you would like to display in your dropdown list.
- You can add further options by clicking ‘+ Add another option’.
- Once you have completed the form click ‘Create Custom Field’.
Once the custom field is created it will appear within the chosen form for staff to select.
If added to the Add Incident or Add Action form it will automatically appear at the bottom of the form. It is not possible to amend the placement of custom fields.
If added to the Student, the field will be available to use within each students profile > ‘Overview’ tab, by clicking the ‘Edit Information’ button.
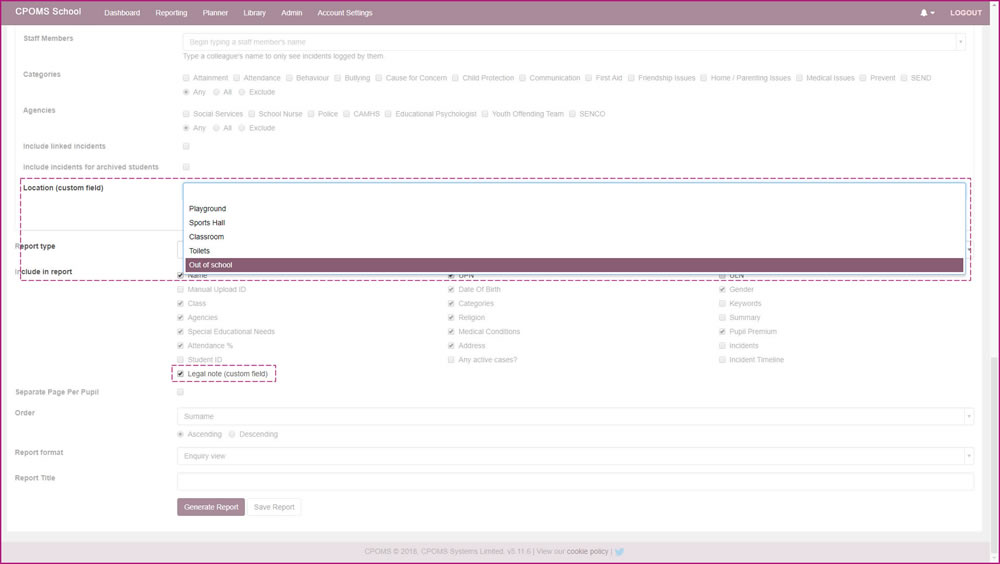
You may also report on Custom fields, they will appear for selection within the Filter by Student/ Incident options, or ‘Include in report’ checkboxes – depending on where the custom field was added to.
Managing your Custom Fields
You can view and edit your existing custom fields within the ‘Admin’ area > ‘Custom Fields’ tab. Here you will find a list of the existing custom fields along with its field type, and field for.
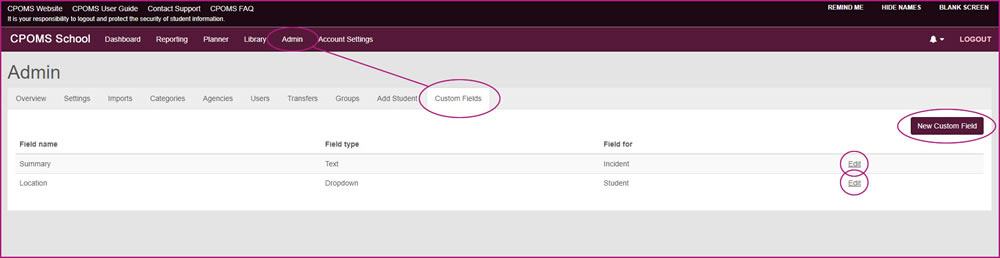
If you click ‘Edit’ at the end of the relevant custom fields row, you can choose to edit it, i.e. to add further dropdown options, or you can choose to delete the custom field altogether.